Table Of Contents
- Basics
- Interface
- Preferences
- Project
- Folio
- What is a folio?
- Type of folio
- Add new Folio
- Delete Folio
- Folio properties
- Title Block
- Element
- What is an element?
- Type of elements
- Element properties
- Element collection
- Element parts
- Element cross reference
- Element editor
- Conductor
- Schema
- What is a schema?
- Working with elements
- Working with conductors
- Working with text field
- Insert table
- Basic objects
- Working with pictures
- Select objects from workspace
- Copy object
- Cut object
- Paste object
- Multiple paste
- Delete object
- Rotate object
- Object layer level
- Search
- Replace
- Drawing
- Reports
- Export and print
- Annex
Polygon
Create polygon
The polygon can only be added to workspace from toolbar.
 from
from Note
If the toolbar is not displayed, it can be displayed from Settings > Display > Parts.
Polygon properties
Element part proterties can be displayed from information panel when the part is selected.
Note
If the information panel is not displayed, it can be displayed from Settings > Display > Information.
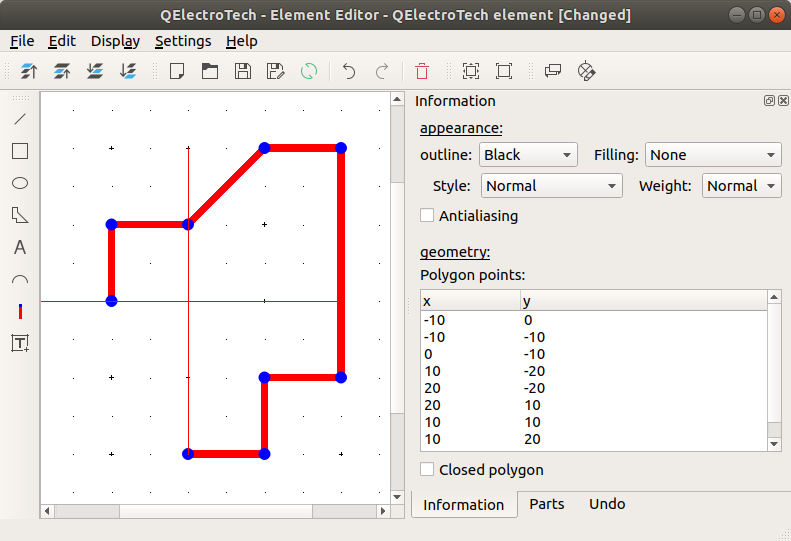
Figure: QElectroTech polygon part from element
QElectroTech allows customizing different polygon properties:
- Appearence
- Color
The outline and filling color of the part can be defined from a list of pre-defined colors. At the case of an open polygon part the filling color is None.
- Style
The outline representation type can be chosen between: Normal (Continuous), Dashed, Dotted or, Dots and dashes.
- Thickness
The outline thickness (Weight) can be chosen between: None, Thin, Normal, Strong or High.
- Geometry
- Type of polygon
QElectroTech has two different types of polygons, open polygon which is assimilated to a group of connected lines and close polygon which is assimilated to closed geometry as the rectangle.
- Coordenates
The polygon points coordinates (x, y) can be defined and storaged in a list.